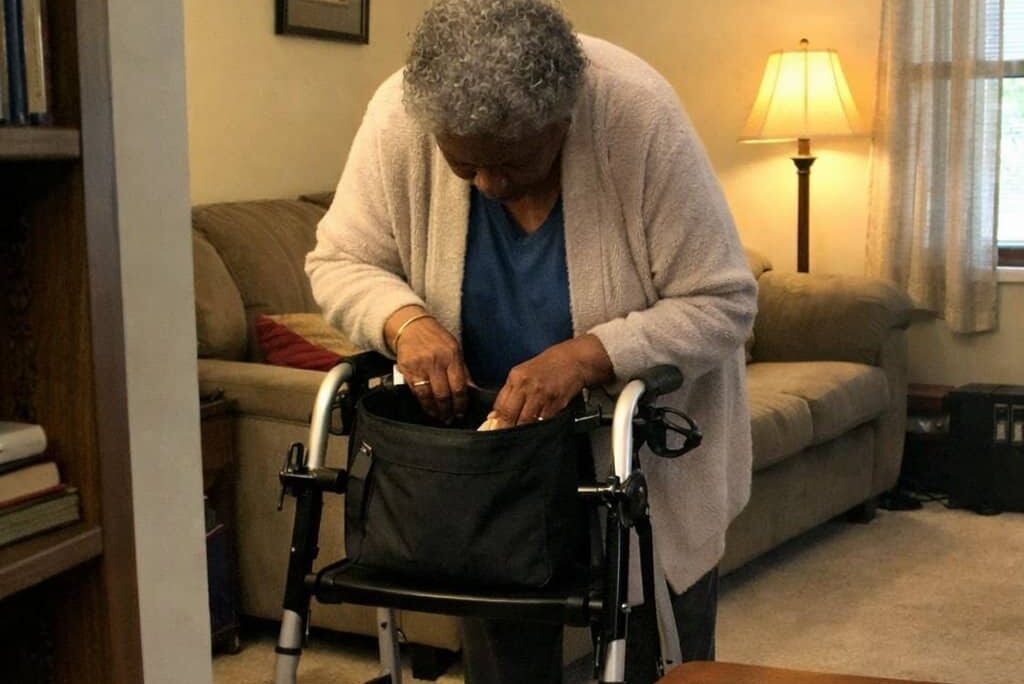
You’ve figured out that a walker makes your daily life safer and more confident. Good. Now you’ve hit the next problem: where do you put everything?
Your phone. Your keys. A water bottle. The small things that used to live in your pockets or a bag over your shoulder. Holding them while gripping the handles isn’t safe — and setting them down constantly isn’t practical. So you start looking at walker bags, and almost immediately a question stops you cold: What if it tips the walker?
That concern is completely valid. It’s also the right question to ask — and it’s exactly what this article is going to answer. Walker bag stability isn’t a mystery once you understand the mechanics. There are five specific factors that determine whether a bag is safe to use on your walker, and once you know them, evaluating any option becomes straightforward.
Let’s work through all five.

Walker Bag Safety Checklist: 5 Factors to Check Before You Buy (or Keep) Any Walker Bag
Download this five-factor safety checklist to identify walker bag problems before they cause a fall—so you can carry what you need without compromising your stability and independence.
Why Walker Bags Can Tip the Walker — And Why Most People Get This Wrong
Here’s what actually causes the problem: tipping isn’t the result of adding a bag. It’s the result of adding the wrong bag, in the wrong position, with too much weight on one side.
Walkers are engineered to balance around your hands at handle height. Any weight hung off the front or sides shifts the center of gravity — and depending on where that weight lands, it can make the walker list sideways, nose-dive forward when lifted, or swing unpredictably when you turn a corner.
The Most Common Culprit: Single-Handle Attachment
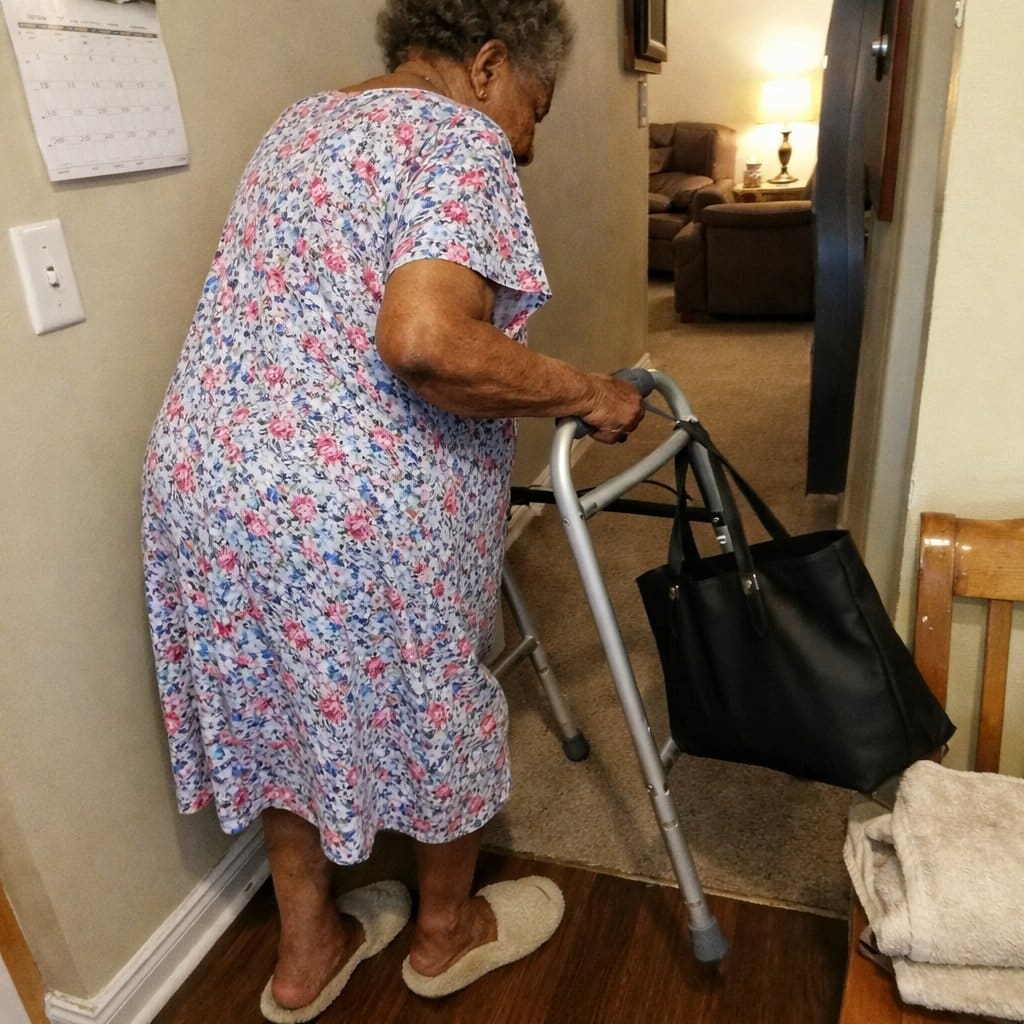
Side-attached bags — the kind that clip or hook to one handlebar — are responsible for most walker bag tipping problems. They create asymmetric load, meaning the walker is heavier on one side than the other. That lateral imbalance is subtle at first and easy to miss until you’re already mid-turn and the walker drifts on you.
The Other Mistake: Front-Heavy Loading
Too much weight forward — especially in a bag that hangs far out from the frame — causes the front of the walker to drop when you lift it to reposition. Over time, this changes how you compensate, which shifts your posture in ways that increase fall risk.
Rollators vs. Standard Walkers
Rollator walkers, with their four-wheel base and lower frame, handle accessory weight more forgivingly than standard folding walkers. If you use a standard walker, walker bag weight distribution matters more — the frame is lighter and more sensitive to off-center load.
The fix is more straightforward than most guides make it sound. Understanding the mechanics of walker bag weight distribution is the same engineering thinking that keeps every other tool in your life functioning correctly. Once you see the five factors, you can apply this checklist to any bag you’re considering.
Factor #1 — Attachment Point and Mounting Method Matter More Than the Bag Itself
Where and how a bag attaches to the walker frame determines nearly everything about stability. The bag’s size, color, and brand are secondary. The attachment system is what to evaluate first.
Walker Bag Attachment Methods Compared
Here’s a quick breakdown of the most common options:
- Single-handle hooks — Clip to one side of the frame. Convenient, but create asymmetric load and lateral tipping risk.
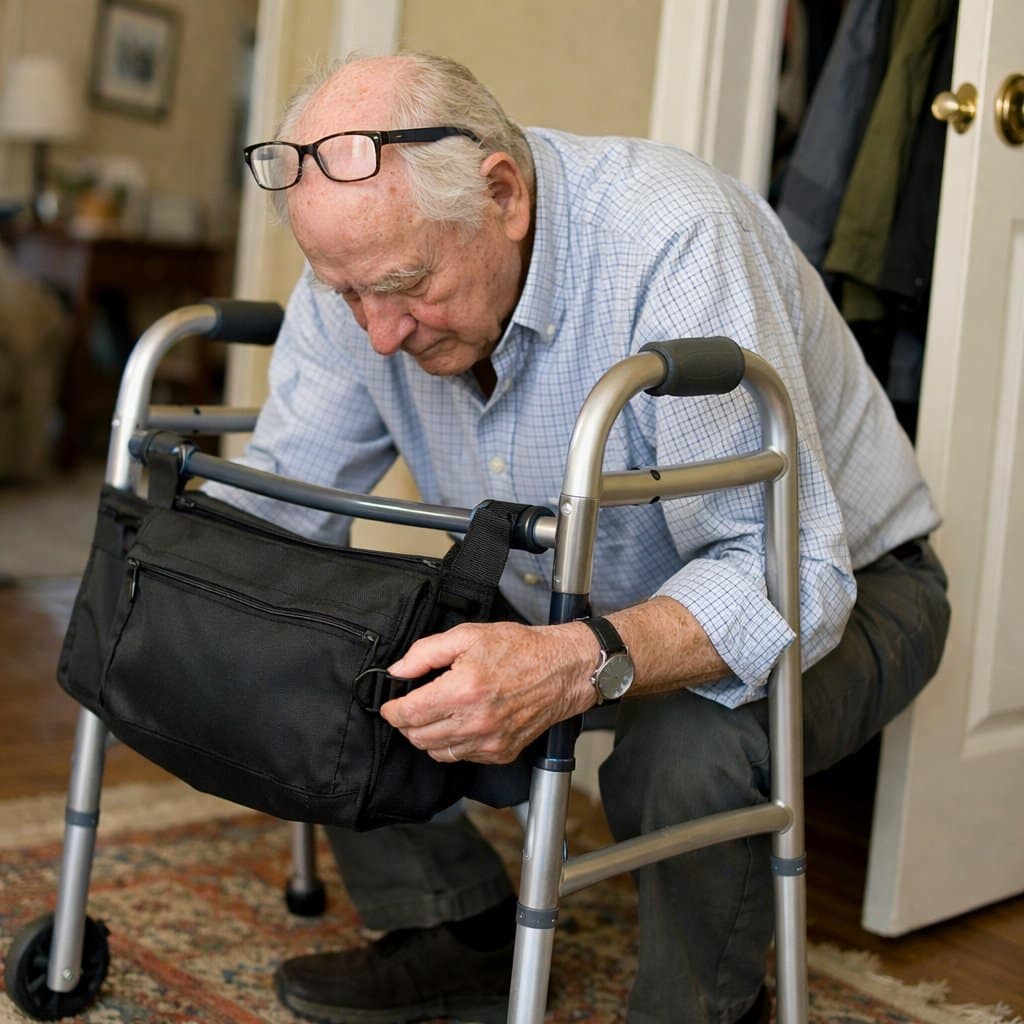
- Dual-strap front mounting — Two straps wrap around the front crossbar. Weight is centered and distributed evenly. This is what you want.
- Cross-bar mounting — Bag sits flush against the front frame and moves as a single unit with the walker. Excellent stability.
- Zip-tie attachment — Sometimes used for DIY setups. Secure if done correctly, but not adjustable and harder to evaluate for fit.
What “Secure Fit” Actually Means
A securely attached walker bag shouldn’t shift when the walker is lifted, turned, or bumped. If it swings freely — even slightly — it’s going to create balance issues over time.
Picture the difference: a bag clipped to one handle swings outward every time you turn a corner. A bag mounted with dual straps across the front crossbar stays centered and moves with the frame. Those two experiences feel completely different in practice.
What to Look For When Shopping
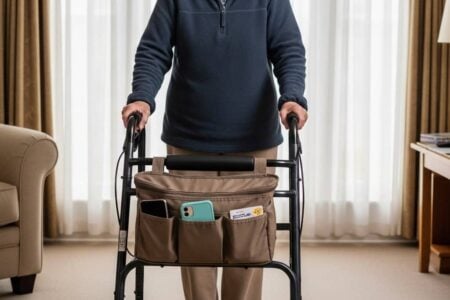
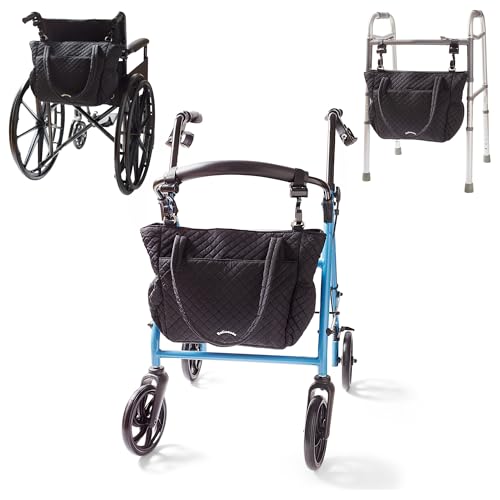
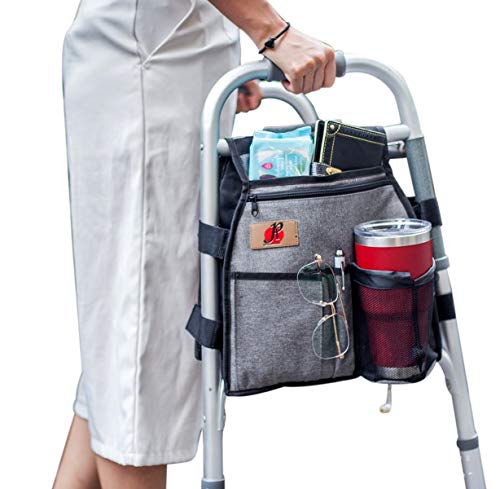
Look for a well-designed walker bag or walker tote bag that includes two attachment points wrapping around the front bar — not a single clip to one handle. A bag designed this way keeps weight centered below the handles, which is exactly where you want it for stable walker bag attachment.


Before committing to any bag, physically test whether it shifts laterally when you lift or turn the walker. This is the step most buyer’s guides skip — and it’s the one that matters most.

Factor #2 — Weight Capacity and What You Actually Plan to Carry


The safe way to carry items with a walker depends as much on what goes into the bag as on how the bag is attached.
Know the Realistic Weight Threshold
Most walker frames are not rated for more than 5–10 lbs of accessory load. Walker bag weight distribution becomes critical above 3 lbs — which is less than you might think. A full water bottle alone is around 1.5 lbs. Add a phone, glasses case, and a small notebook, and you’re already at the threshold.
What Belongs in a Walker Bag (and What Doesn’t)
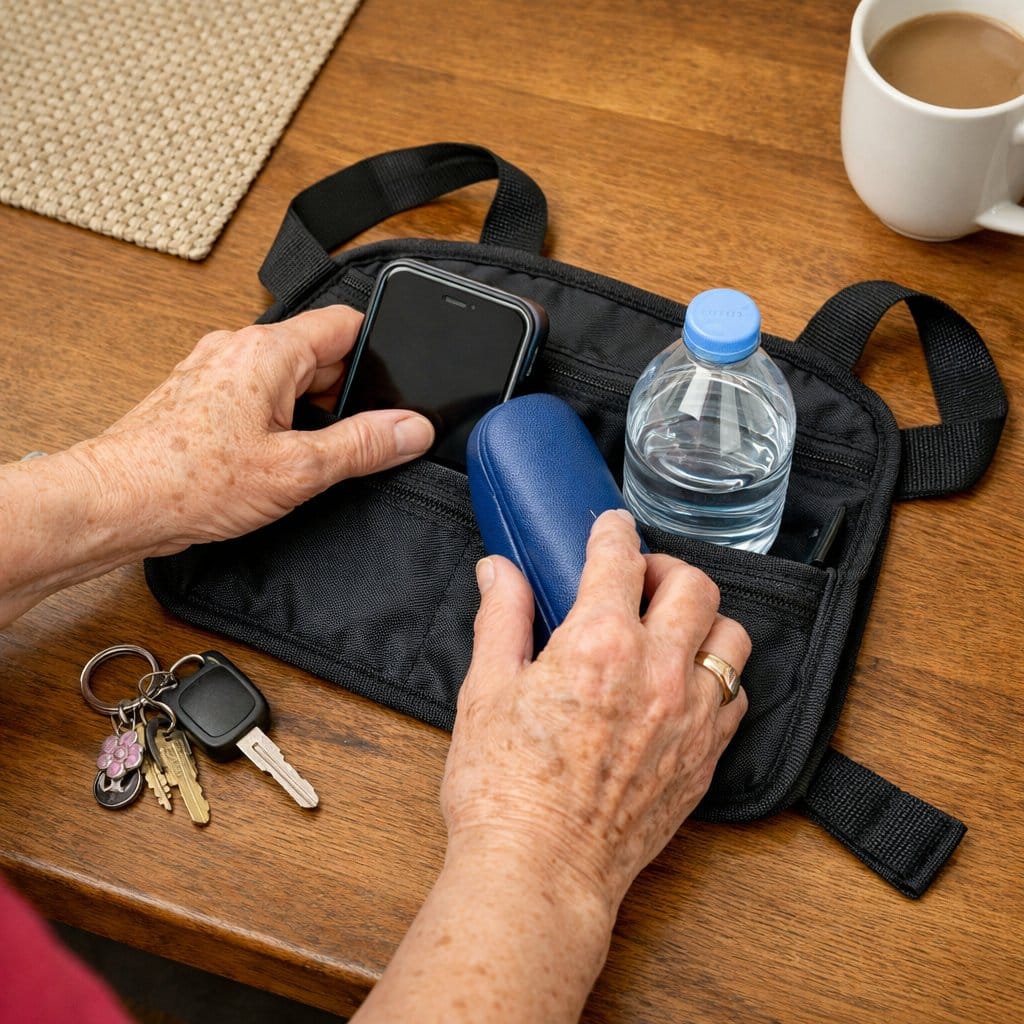
Good candidates for daily carry:
- Phone
- Glasses and case
- Medication in a small container
- A half-full water bottle
- Keys and a small wallet
Leave these out:
- Heavy groceries or canned goods
- Books or tablets
- Laptops or bulky items
- Anything you’d normally carry in a tote bag
The walker bag is a light-carry tool, not a replacement for a shopping bag. Treating it like one is how people end up noticing the walker pulling forward before they realize what changed.
Rollator Users Have a Little More Flexibility
If you use a rollator, the four-wheel base provides more stability for slightly heavier loads than a standard folding walker. A rollator walker bag can reasonably carry a bit more — but the 5 lb guideline is still a smart ceiling.
Before you buy, write down the three to five items you’d want in a walker bag every single day and estimate their combined weight. Use that number to guide size selection. You’re not looking for the biggest bag — you’re looking for the right bag for your actual carry weight.
This kind of planning is also connected to thinking ahead about how you move through your day and what [mobility aids](https://www.grayingwithgrace.com/mobility-aids-elderly-people-need/) genuinely help versus add complexity.
Factor #3 — Frame Fit: Does the Bag Match Your Walker’s Width and Style?
A bag designed for one walker type may destabilize a different one entirely. Frame fit isn’t optional — it’s non-negotiable.
Why Walker Frames Vary More Than People Expect
Standard folding walkers have narrower front crossbars than rollators. Bariatric walkers are wider still. Three-wheel walkers have a different geometry altogether. A rollator walker bag sized for a wide frame will hang unevenly and droop to one side on a narrow standard walker — even if the attachment method is technically correct.
The Two-Step Measurement Guide
This is the step most buyer’s guides skip:
- Measure the width of your front crossbar in inches before you shop.
- Compare that measurement to product dimensions listed in the item description or FAQ before ordering.
Five minutes of measuring prevents the frustration of returning a perfectly good bag that just wasn’t made for your walker.
Walker Pouch vs. Walker Bag Stability
Smaller pouches that mount high on the frame affect balance differently than larger bags that hang lower. Lower-hanging bags are generally more stable because they keep the center of gravity closer to the ground. If you’re choosing between a high-mounted pouch and a lower-hanging bag of similar capacity, the lower option will typically feel more balanced during use.
Rigid walker baskets follow similar logic — they mount at frame level and don’t swing, which is why walker baskets and frame-level walker bags often feel more stable than accessories that hang above the crossbar. When comparing options, look at whether the bag sits at or below handle height, not above it.




Factor #4 — Accessibility When You Need It Most
A bag that’s hard to open or reach from a standing position creates a new safety problem — even if it’s perfectly stable on the frame.
Why Accessibility Is a Safety Issue
Reaching awkwardly into a bag attached to a walker can pull you off balance or shift your grip on the handles. If retrieving your phone requires you to look down, lean forward, and fumble with a small zipper, you’ve traded one risk for another.
What Good Accessibility Looks Like
- Wide openings that let you see and reach contents without digging
- Large zipper pulls that work easily for hands affected by arthritis or reduced dexterity — something worth reviewing alongside [kitchen utensils for arthritic hands](https://www.grayingwithgrace.com/kitchen-utensils-for-arthritic-hands/) if grip is a concern for you
- Magnetic closures or open-top designs for the fastest access
- Placement at a height that doesn’t require bending down to reach
The Hidden Risk of Bags Mounted Too Low
Low-hanging bags require you to look down and bend slightly — both of which shift your center of gravity while you’re standing. This is a manageable tradeoff if the bag is only a few inches below handle height, but a bag that hangs near knee level requires a posture change every time you access it.
How to Evaluate Before You Buy
Read reviewer comments specifically about accessibility — not just overall satisfaction. Look for comments from people who describe their hand strength or dexterity honestly. If a reviewer mentions struggling to open the zipper, that’s real information about fit and function for your situation.
A bag that’s stable but inaccessible is just as problematic as one that tips. Both elements need to pass the test.
Ready to discover more practical strategies for staying independent and mobile? Subscribe to our newsletter for expert-tested tips and product recommendations designed specifically for older adults.

Factor #5 — Testing Stability Before Your First Real Outing
No buyer’s guide — including this one — replaces a five-minute stability test in your own home. This is where the evaluation becomes real.
The Home Stability Test
Once you’ve received your bag and attached it to the walker, do this before you take it anywhere:
- Load the bag with exactly what you’d carry on a typical day.
- Walk from room to room at your normal pace.
- Turn corners in both directions.
- Stop, start, and lift the walker to reposition it.
- Notice whether anything feels different about how the walker handles.
What to Watch For
- Lateral drift when turning — the walker leaning slightly to one side
- Forward pull when lifting — the front dipping as you pick the walker up
- Swinging or shifting of the bag itself when you change direction
How to Adjust If You Notice Issues
If something feels off, don’t head out the door. Redistribute weight inside the bag — heavier items centered, lighter items to the sides. Remove one item and retest. Check whether the attachment straps have shifted and re-tighten them. Most minor instability can be corrected in a few minutes of adjustment.
This is the same approach a careful engineer or experienced craftsperson takes before using any new tool in a real-world situation. Testing at home — where the stakes are low — is smart preparation, not overcaution.
Understanding this kind of practical home safety thinking connects directly to [fall prevention strategies](https://www.grayingwithgrace.com/how-to-prevent-falls-elderly-fall-prevention-checklist/) that make a real difference in daily life. The goal isn’t to eliminate all risk — it’s to make informed, testable decisions that keep you moving confidently.
Walker Bag Safety Checklist: 5 Factors to Check Before You Buy (or Keep) Any Walker Bag
Download this five-factor safety checklist to identify walker bag problems before they cause a fall—so you can carry what you need without compromising your stability and independence.
Choosing a Walker Bag with Real Confidence
The walker bag tipping problem isn’t mysterious. It comes down to five factors you can evaluate for any bag you’re considering:
- Attachment method — Dual-strap or frame-mounted, centered below the handles
- Weight capacity — Know your carry weight before you choose a size
- Frame fit — Measure your crossbar width and compare before ordering
- Accessibility — Opening mechanism and placement must work from a standing position
- Home stability test — Loaded and walked before your first real outing
Adding a bag to your walker isn’t a small thing. It changes how independently you move through your day — hands free, organized, not stopping every few minutes to manage what you’re carrying. Done right, it’s one of the simplest upgrades to daily independence a walker user can make.
If you’re looking for a starting point, I’d encourage you to look at the reviewed product above — it’s the option I evaluated against these five factors and found it hits the key marks on attachment method, frame fit, and accessibility.
And I’d genuinely like to hear from you: what do you currently use to carry things with your walker? What’s worked well, and what created problems? Share your experience in the comments — your real-world insight is exactly what helps someone else make a better decision.
If you’re also thinking about broader mobility decisions — like whether a rollator or a standard walker makes more sense for your lifestyle — the guide on [choosing the right mobility aids](https://www.grayingwithgrace.com/mobility-aids-elderly-people-need/) is a good next read. And for anyone managing arthritis alongside mobility challenges, [bathroom safety products](https://www.grayingwithgrace.com/elderly-bathroom-safety-products-buying-guide/) and [fall prevention resources](https://www.grayingwithgrace.com/how-to-prevent-falls-elderly-fall-prevention-checklist/) round out the picture of what it takes to stay safely independent at home.